


This guide shows you how to add an AI chatbot to a WordPress website. The steps depend on which product experience you use.
For new setups, we recommend building an AI Agent in Text. You configure it in the Text App, where it uses knowledge, instructions, customer context, and Skills to answer questions and take actions without requiring you to design every conversation path.
If you already use the previous ChatBot Visual Builder and AI Assist workflow, it remains available. Keep reading for the recommended AI Agent setup, or continue to the existing ChatBot instructions later in this guide.
How to add AI Agent in Text to WordPress

The Text plugin adds the Text website widget to your WordPress site without requiring you to paste widget code. The widget can connect visitors with your AI Agent and your support team.
Before you start
Make sure you have:
- WordPress 6.0 or higher
- PHP 7.4 or higher
- A Text account, which you can create during setup
Before installing the widget, open Team → AI agents in the Text App. Add the knowledge and instructions your AI Agent should use, configure its Skills, test its responses, and turn on Accept chats. See AI agents in the Text Help Center for details.
You can install the plugin from the WordPress Plugin Marketplace, start the guided setup from Text, or upload the plugin manually.
Install from the WordPress Plugin Marketplace
Step 1: Install and activate the Text plugin
In your WordPress admin dashboard, go to Plugins → Add Plugin. Search for AI Chatbot by Text or Text, and select the plugin published by Text, currently listed as Text: AI chatbot, live chat & ticketing for customer service. Select Install Now, then Activate.

Step 2: Connect the plugin to Text
Open the Text tab in the WordPress sidebar and select Connect Text. Log in to your Text account or create one.
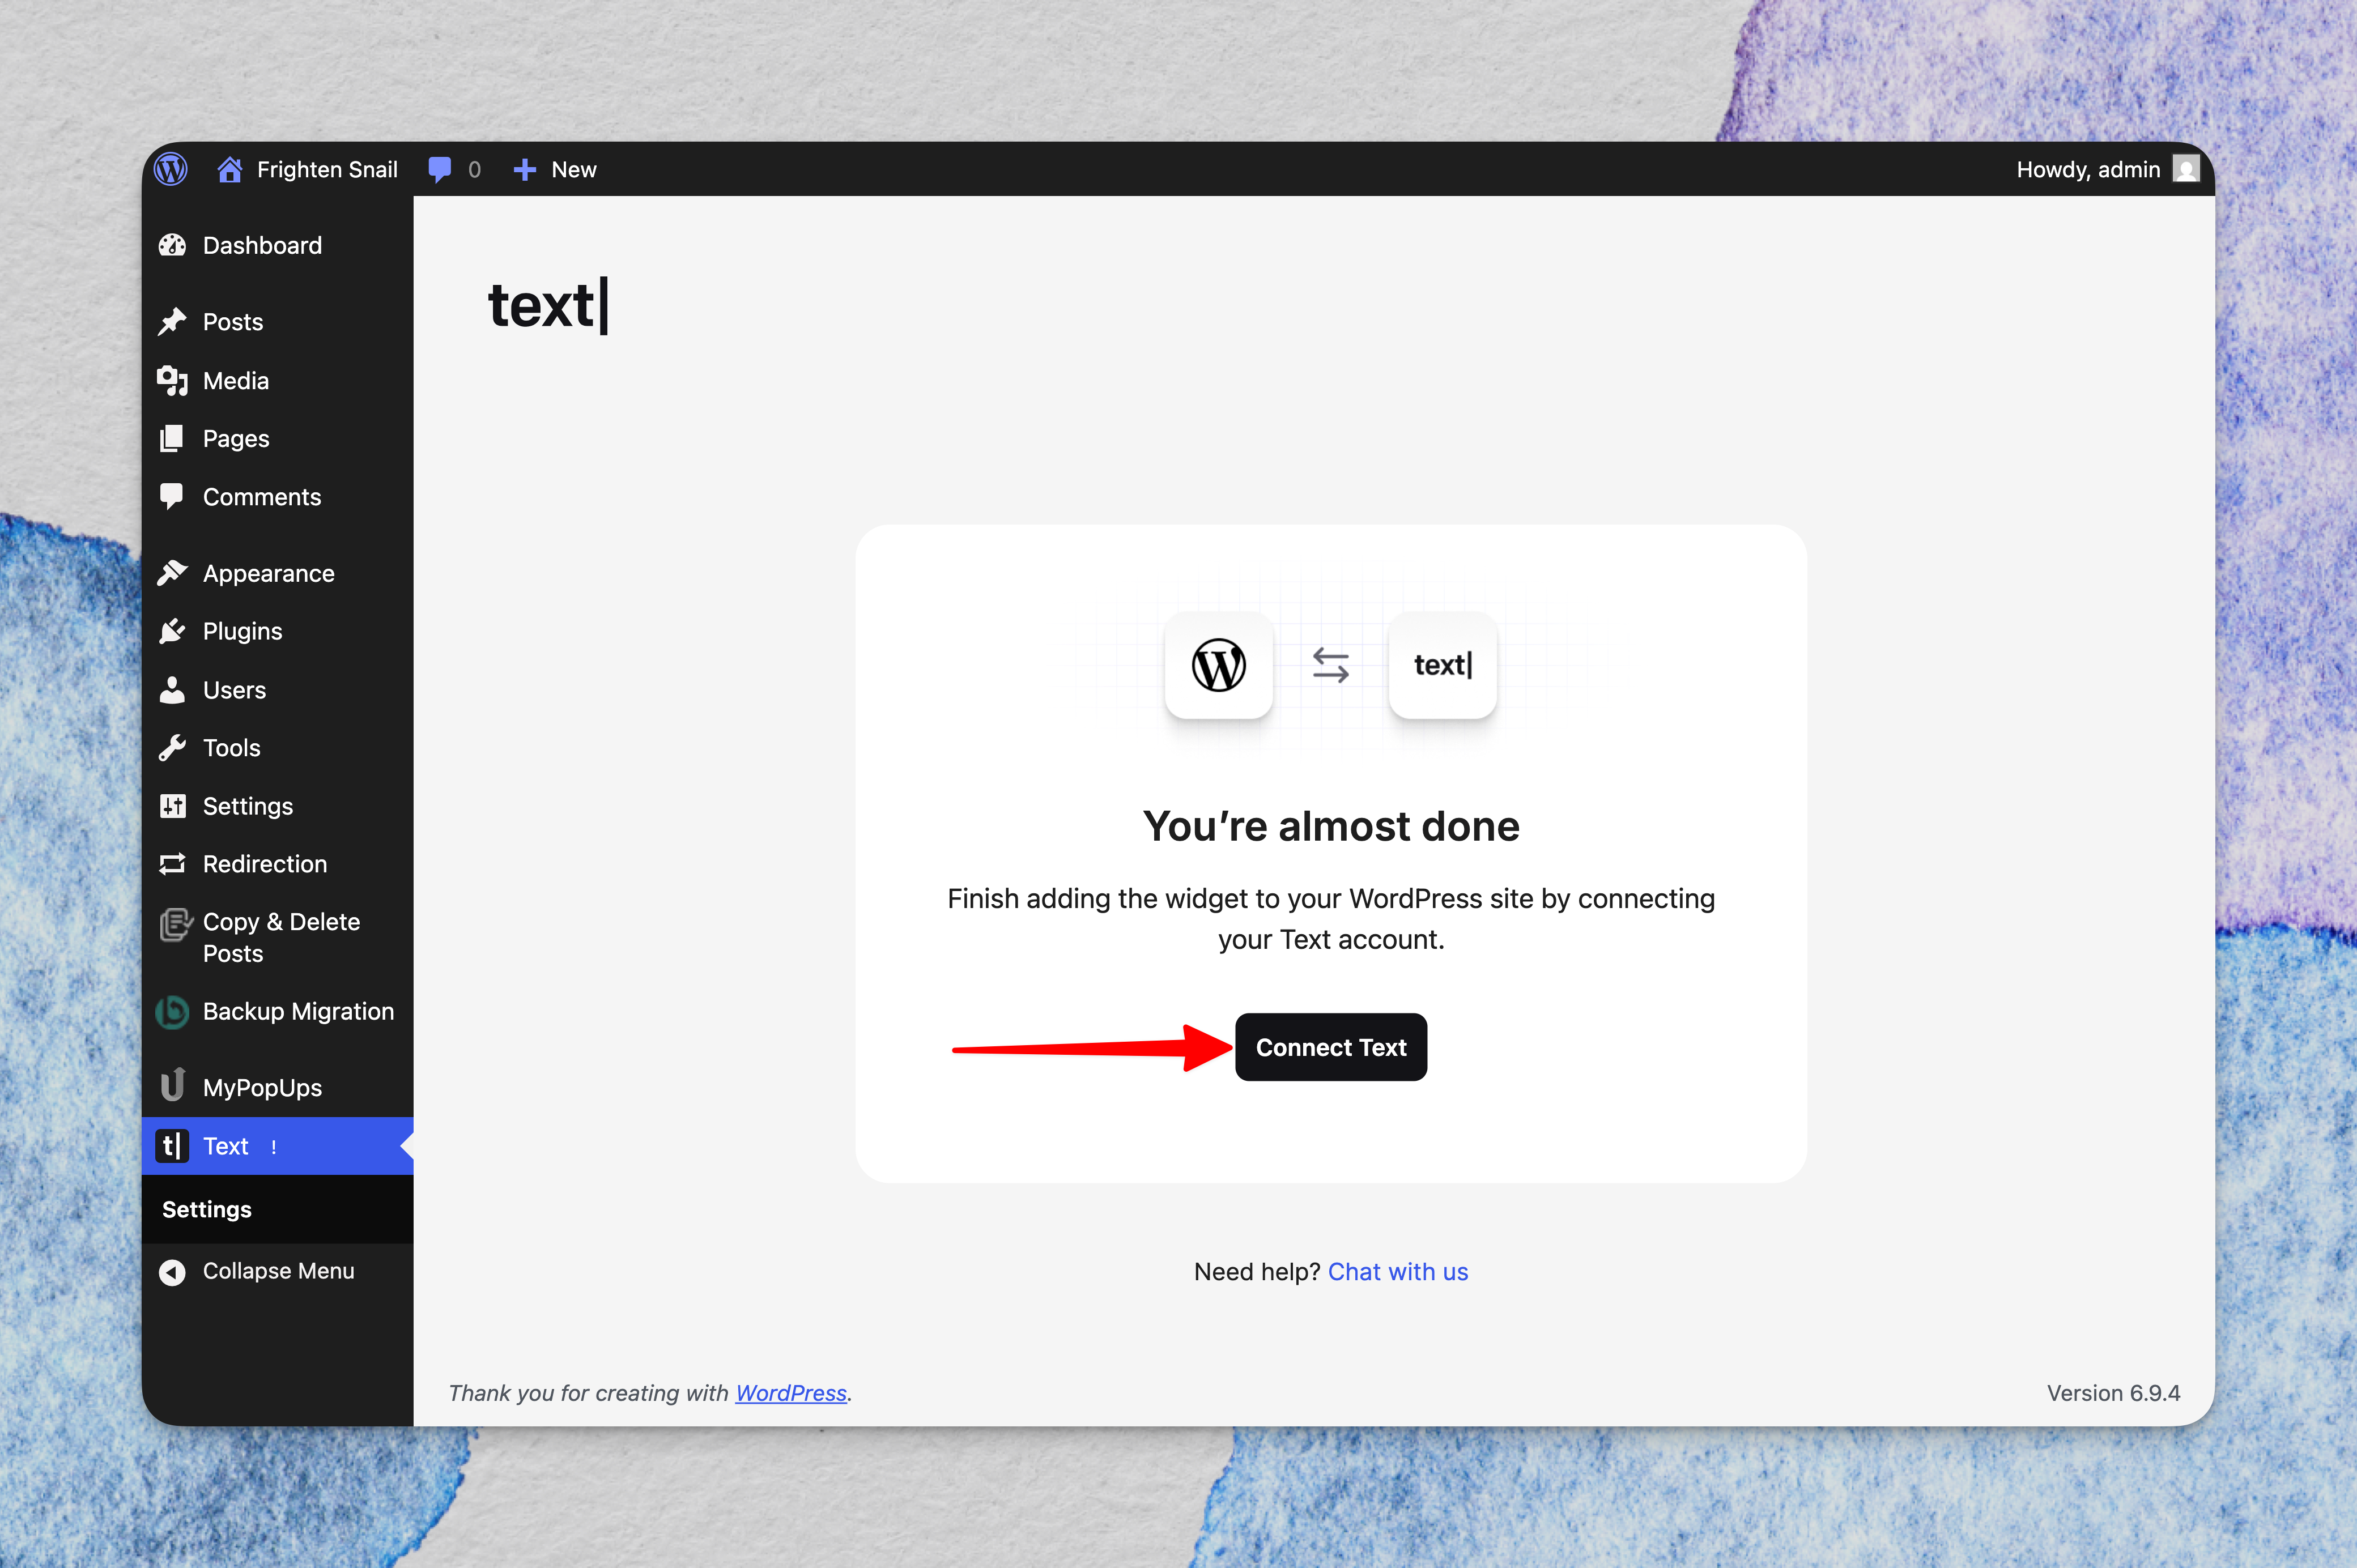
Step 3: Complete the setup
Finish the setup in Text. You can manage the connection in Settings → Website widgets.
If the status does not change to Connected, visit your website and interact with the widget. Then return to Settings → Website widgets and check the status again.
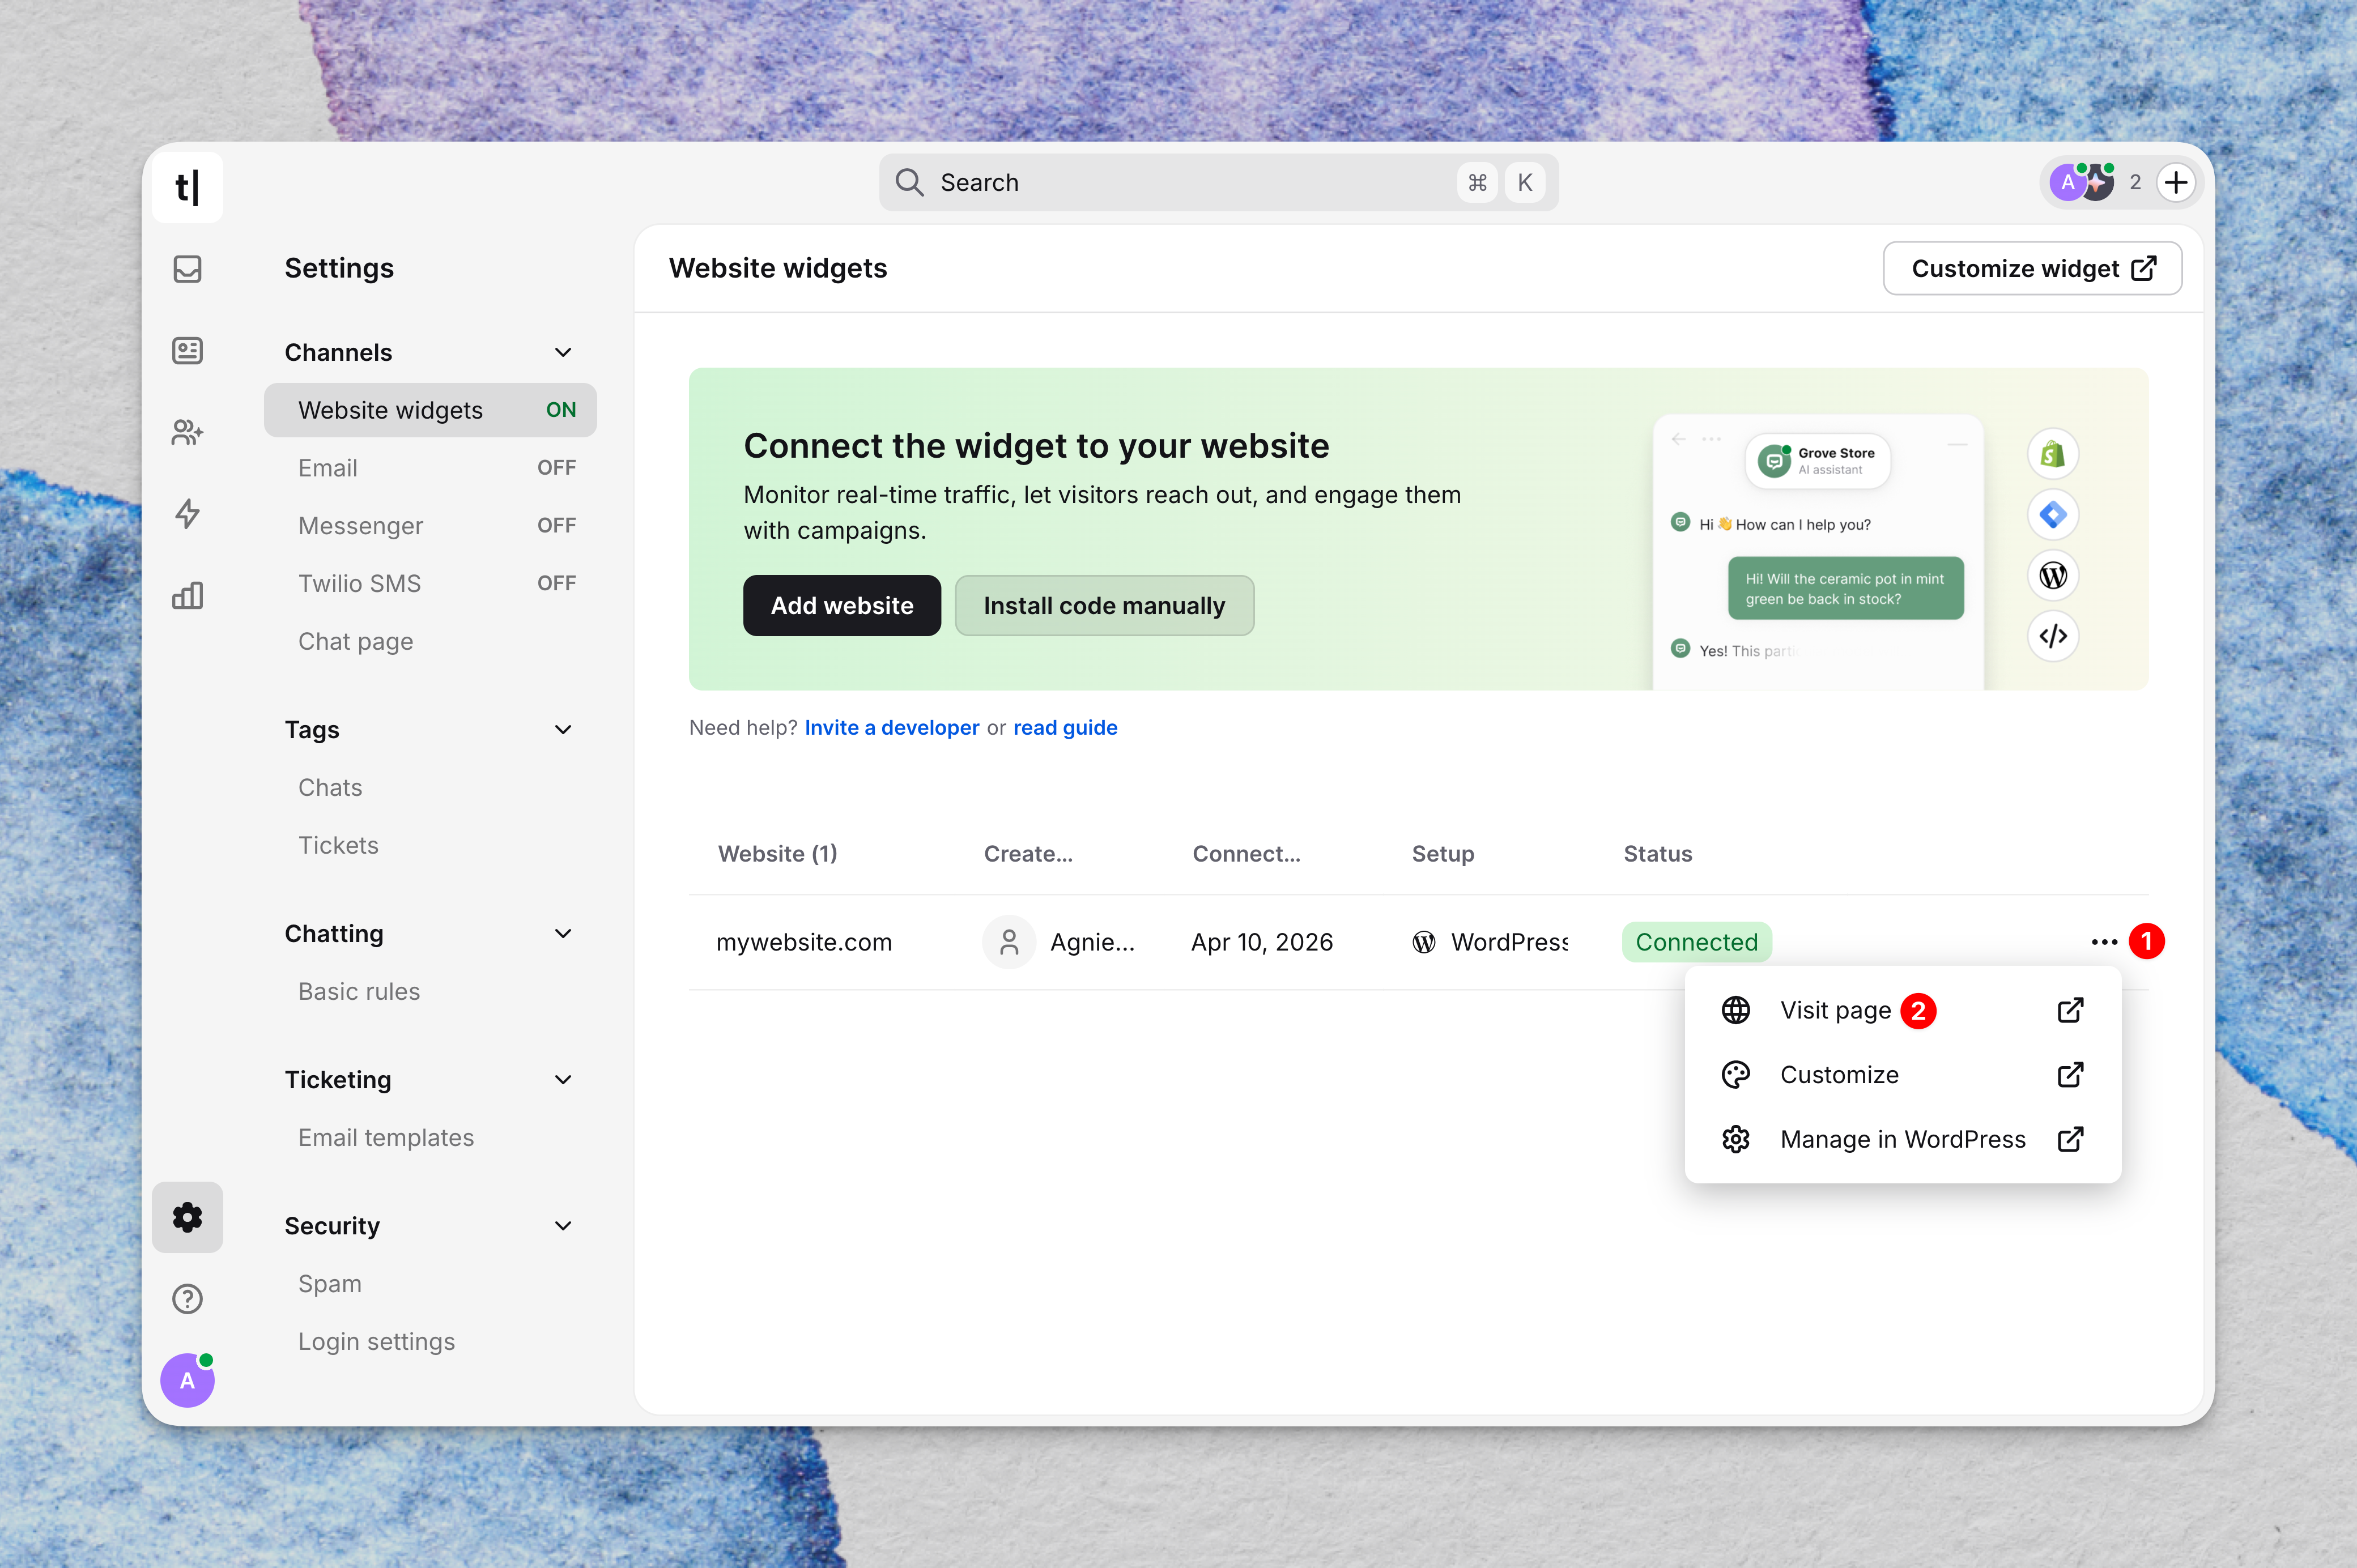
Install from Text
Step 1: Open the website widget settings
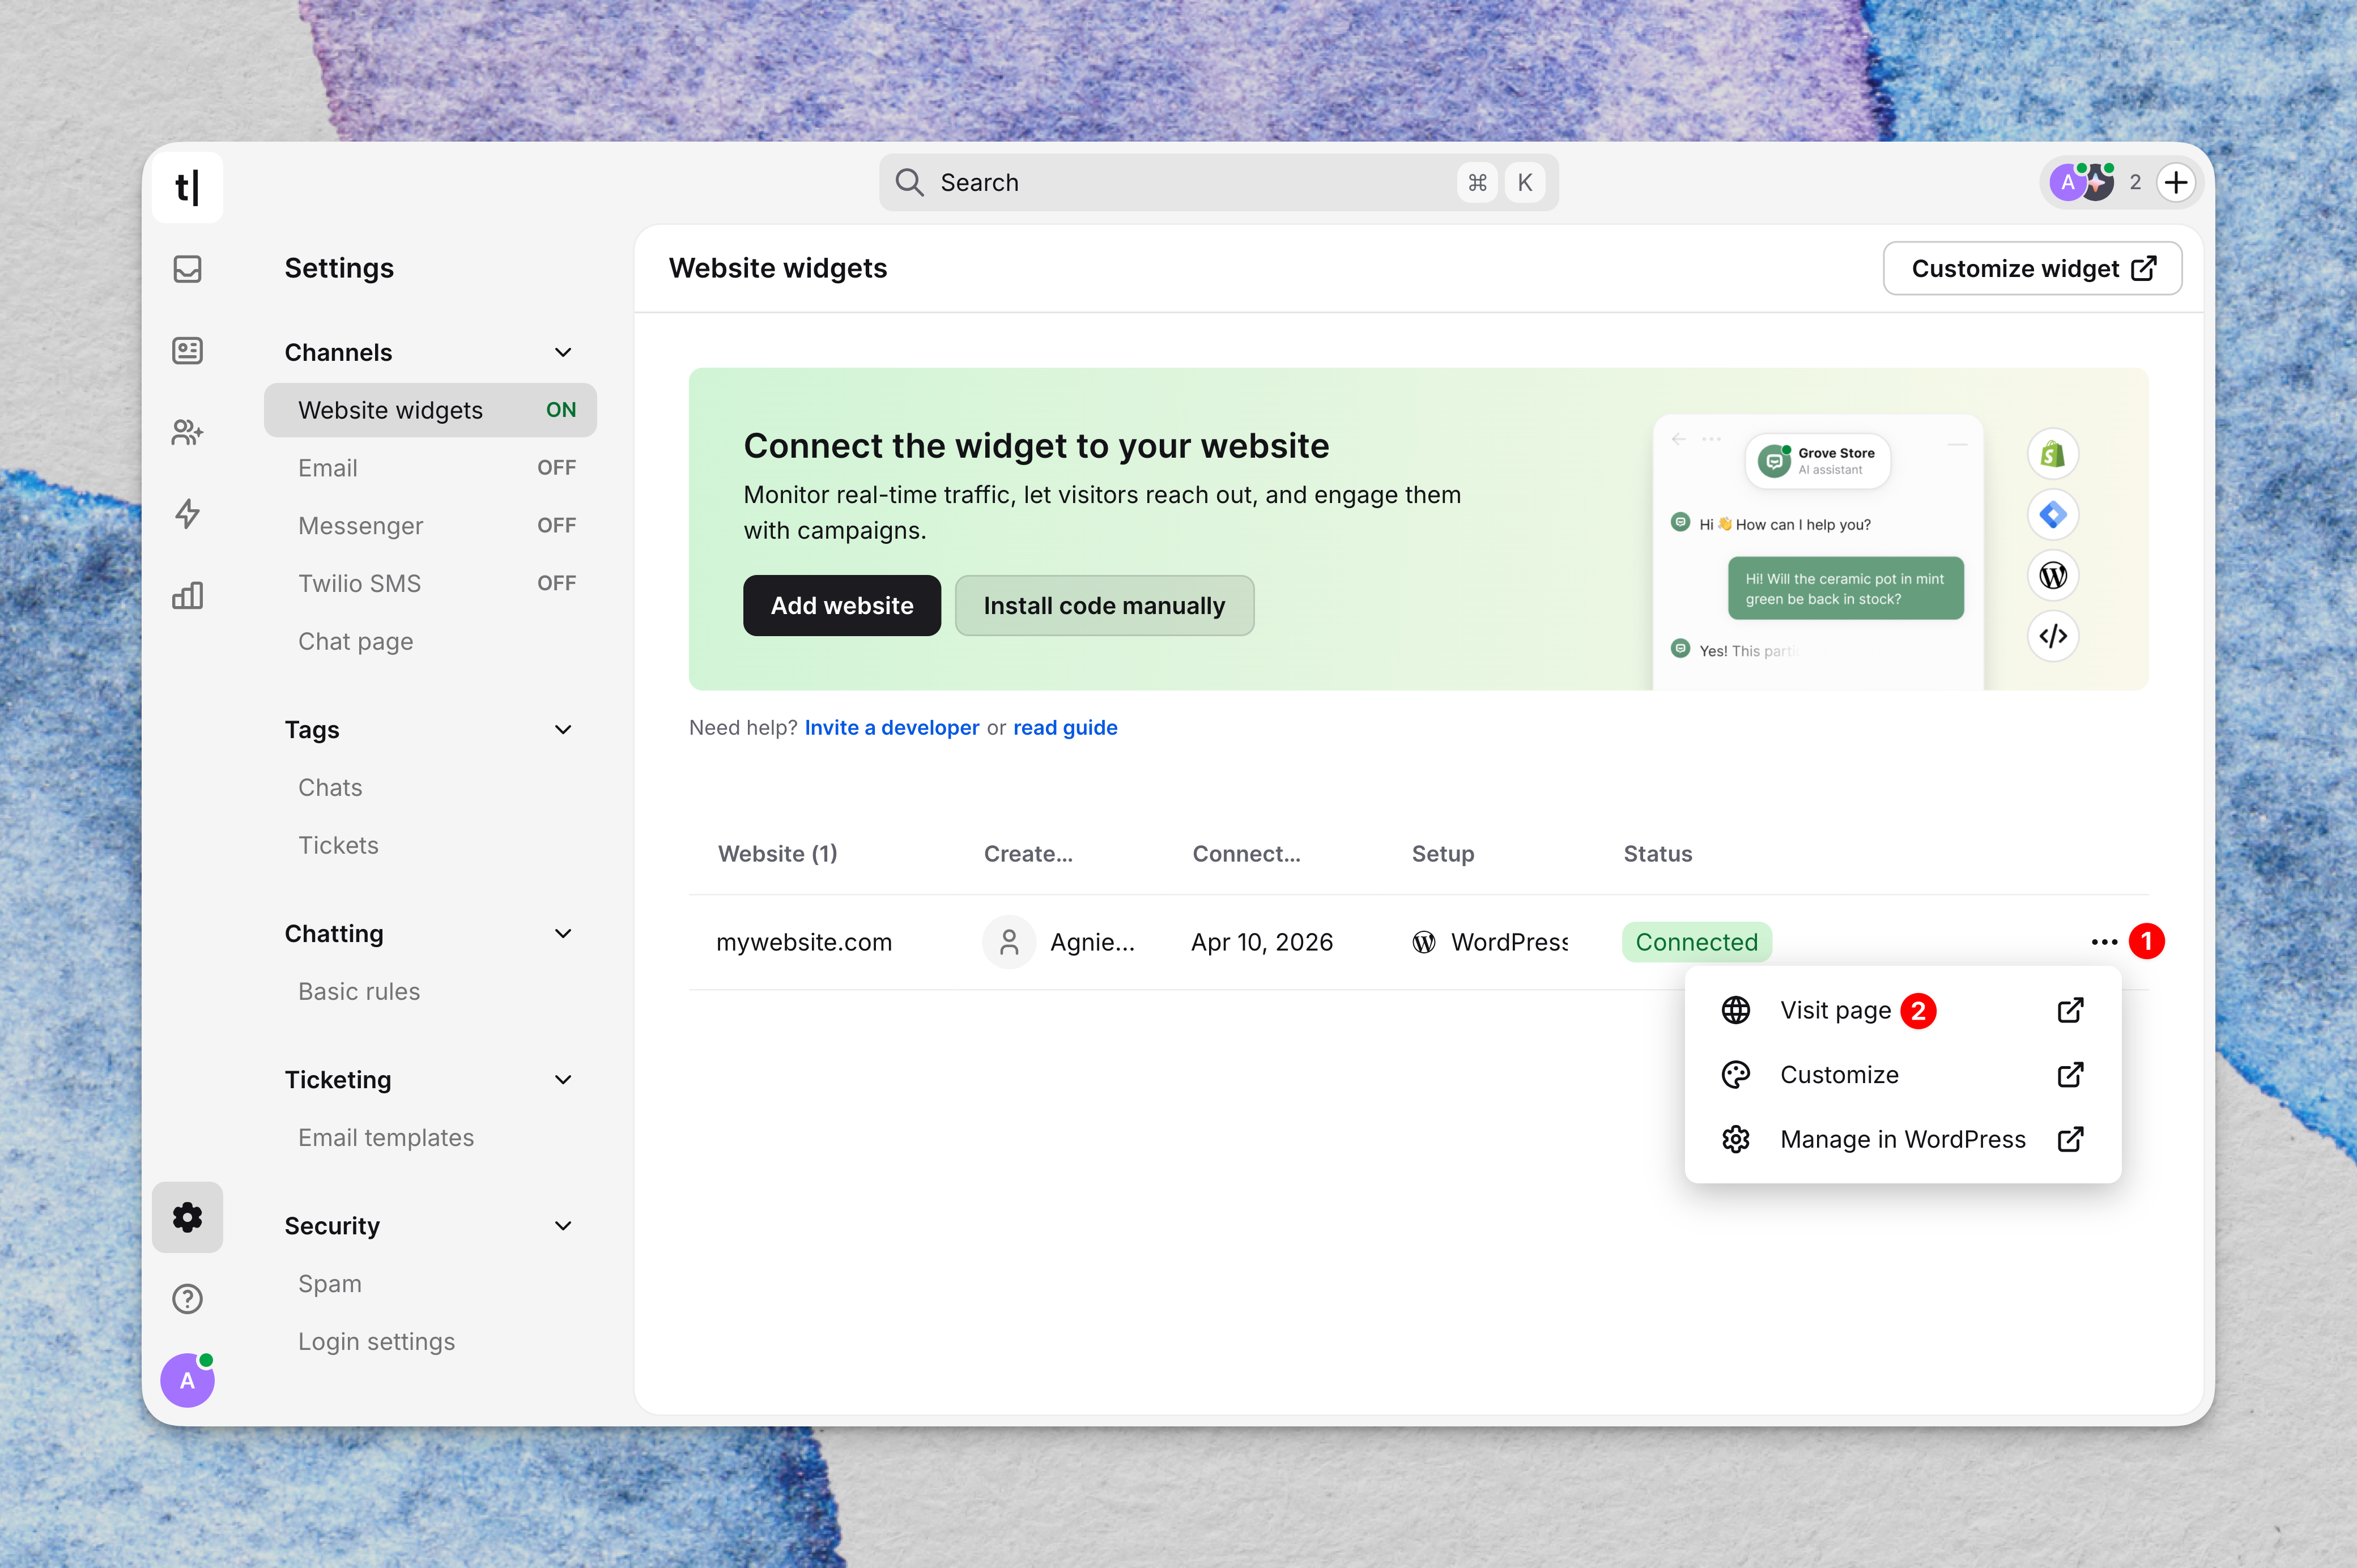
Log in to the Text App and go to Settings → Website widgets.
Step 2: Enter your website address
Enter the URL of the WordPress website where you want to add the widget, then select Continue.

Step 3: Select WordPress as the installation method
Select WordPress (Recommended), then select Add to WordPress. This opens the plugin page in the WordPress Plugin Directory.
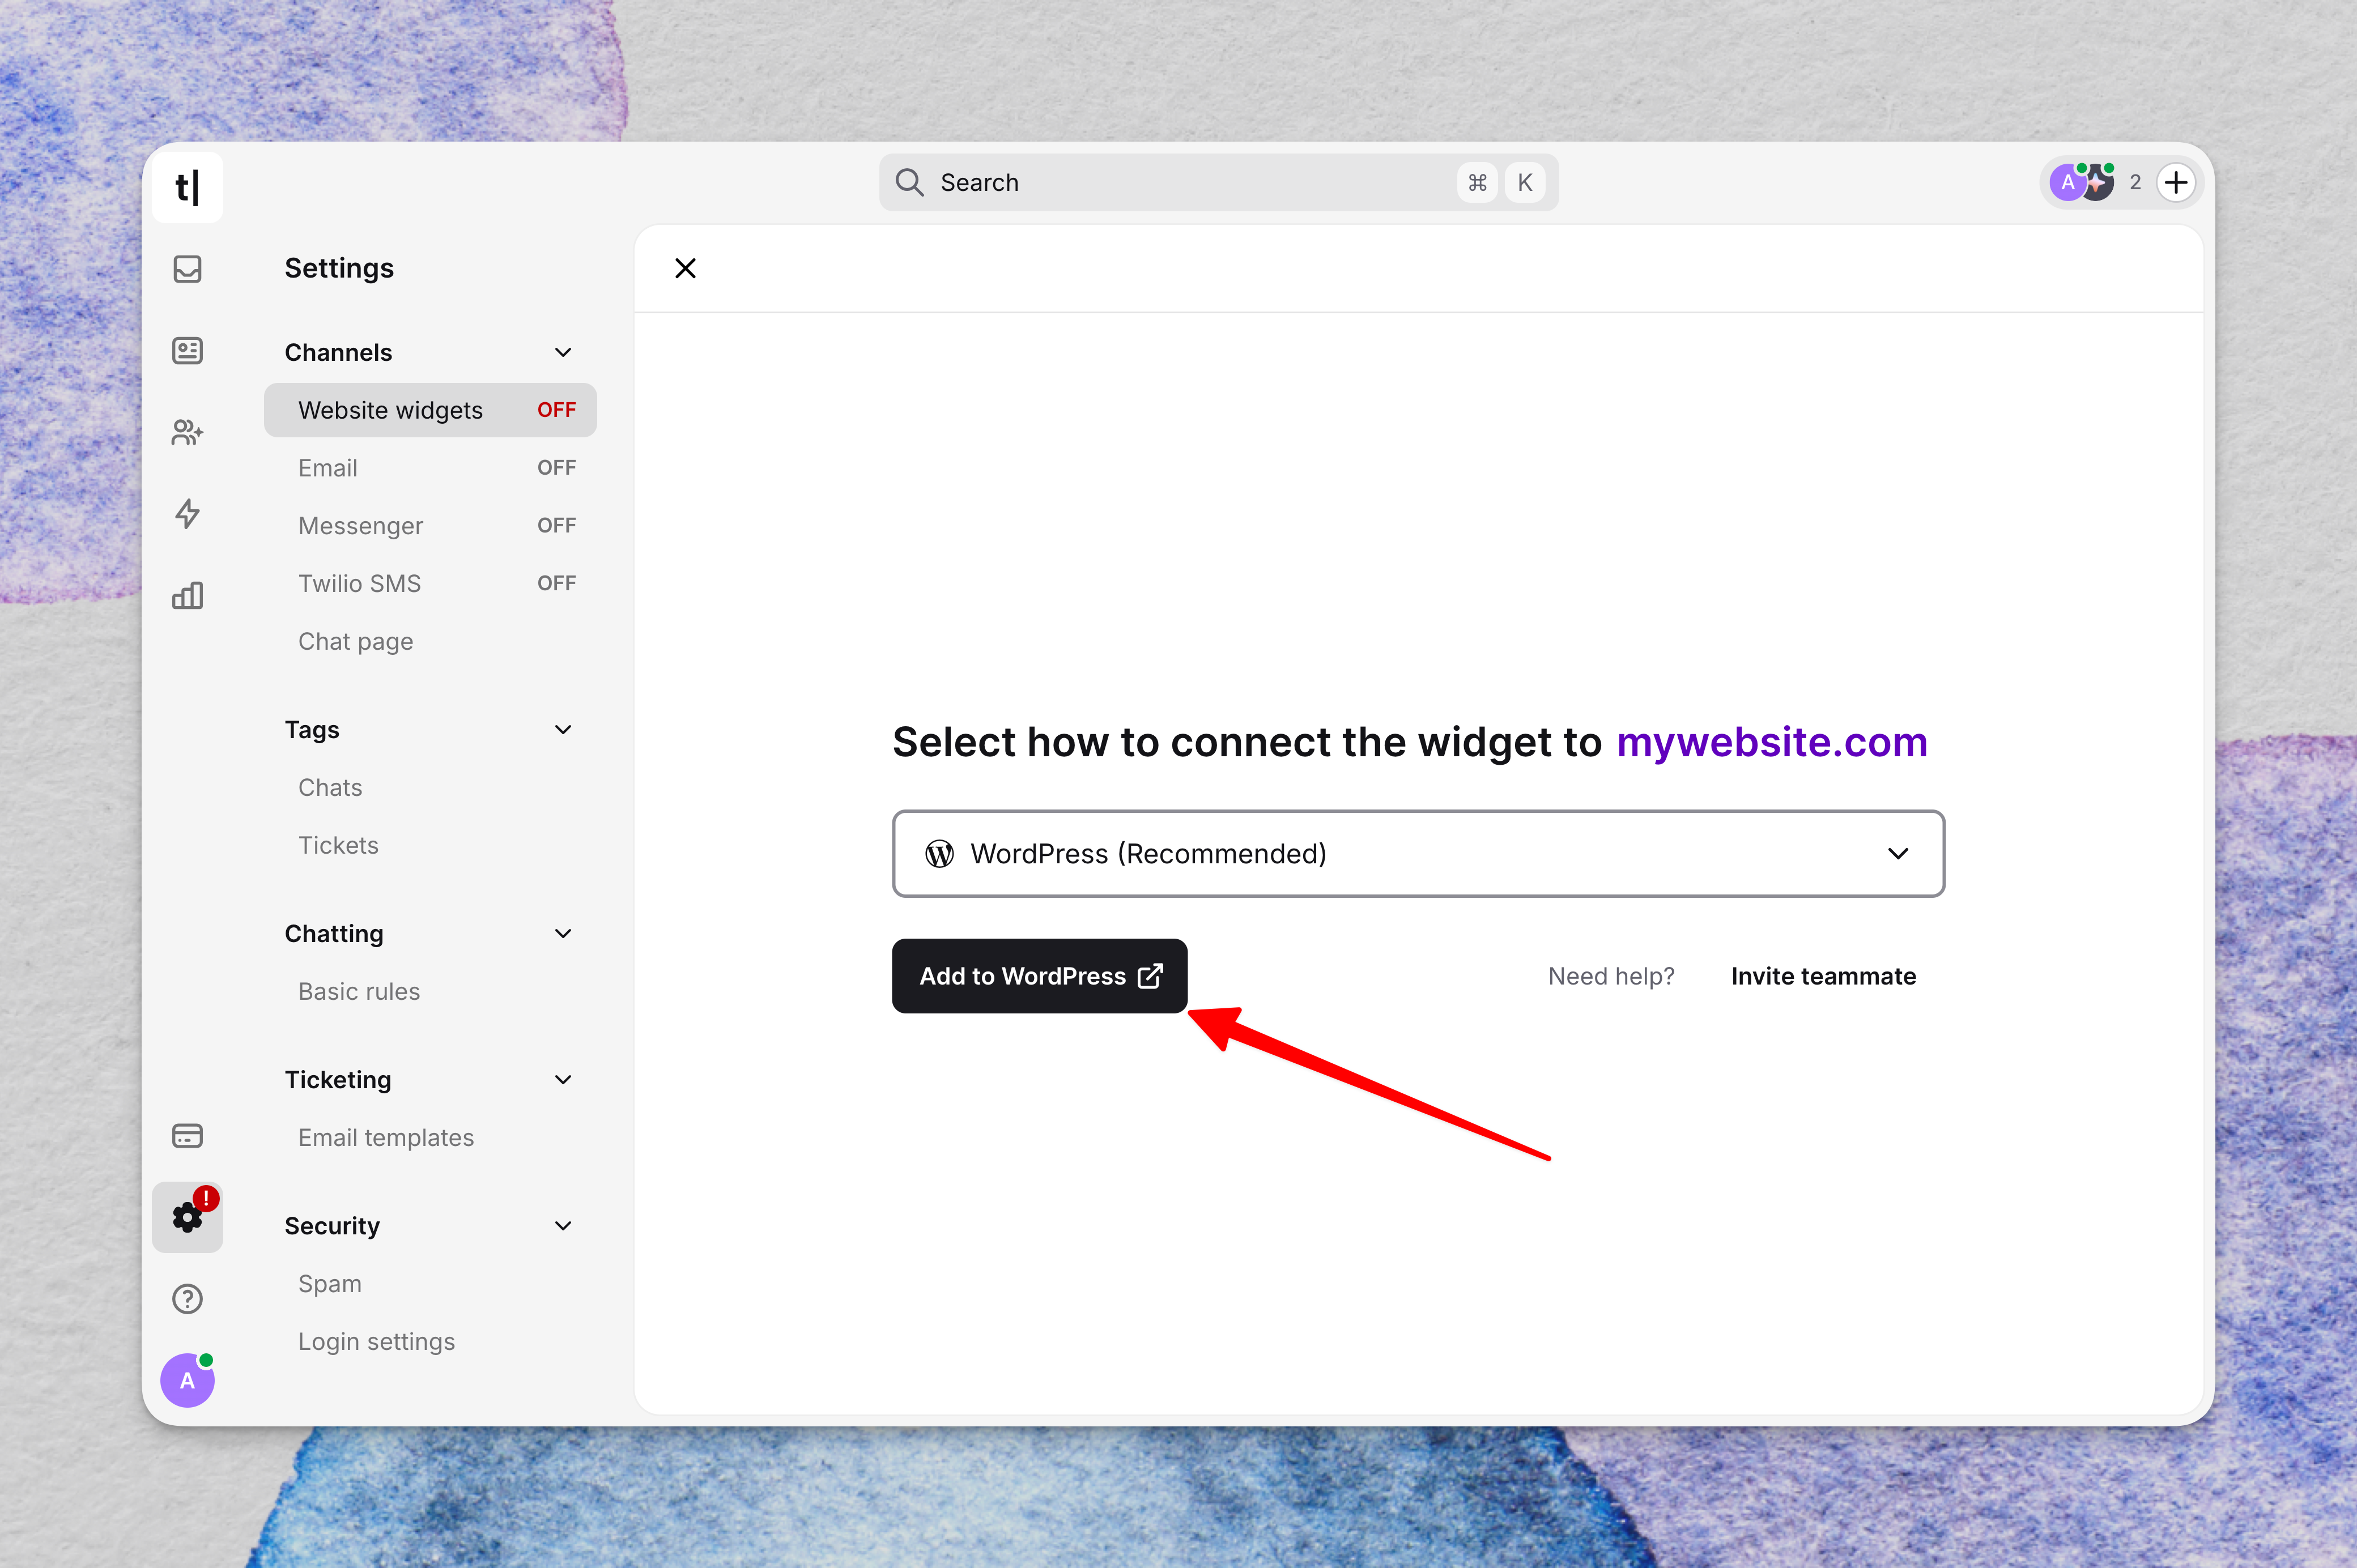
Step 4: Install and activate the plugin
In WordPress, go to Plugins → Add Plugin. Search for the Text plugin, select Install Now, and then select Activate.

Step 5: Connect WordPress to Text
Open the Text tab in the WordPress sidebar and select Connect Text.
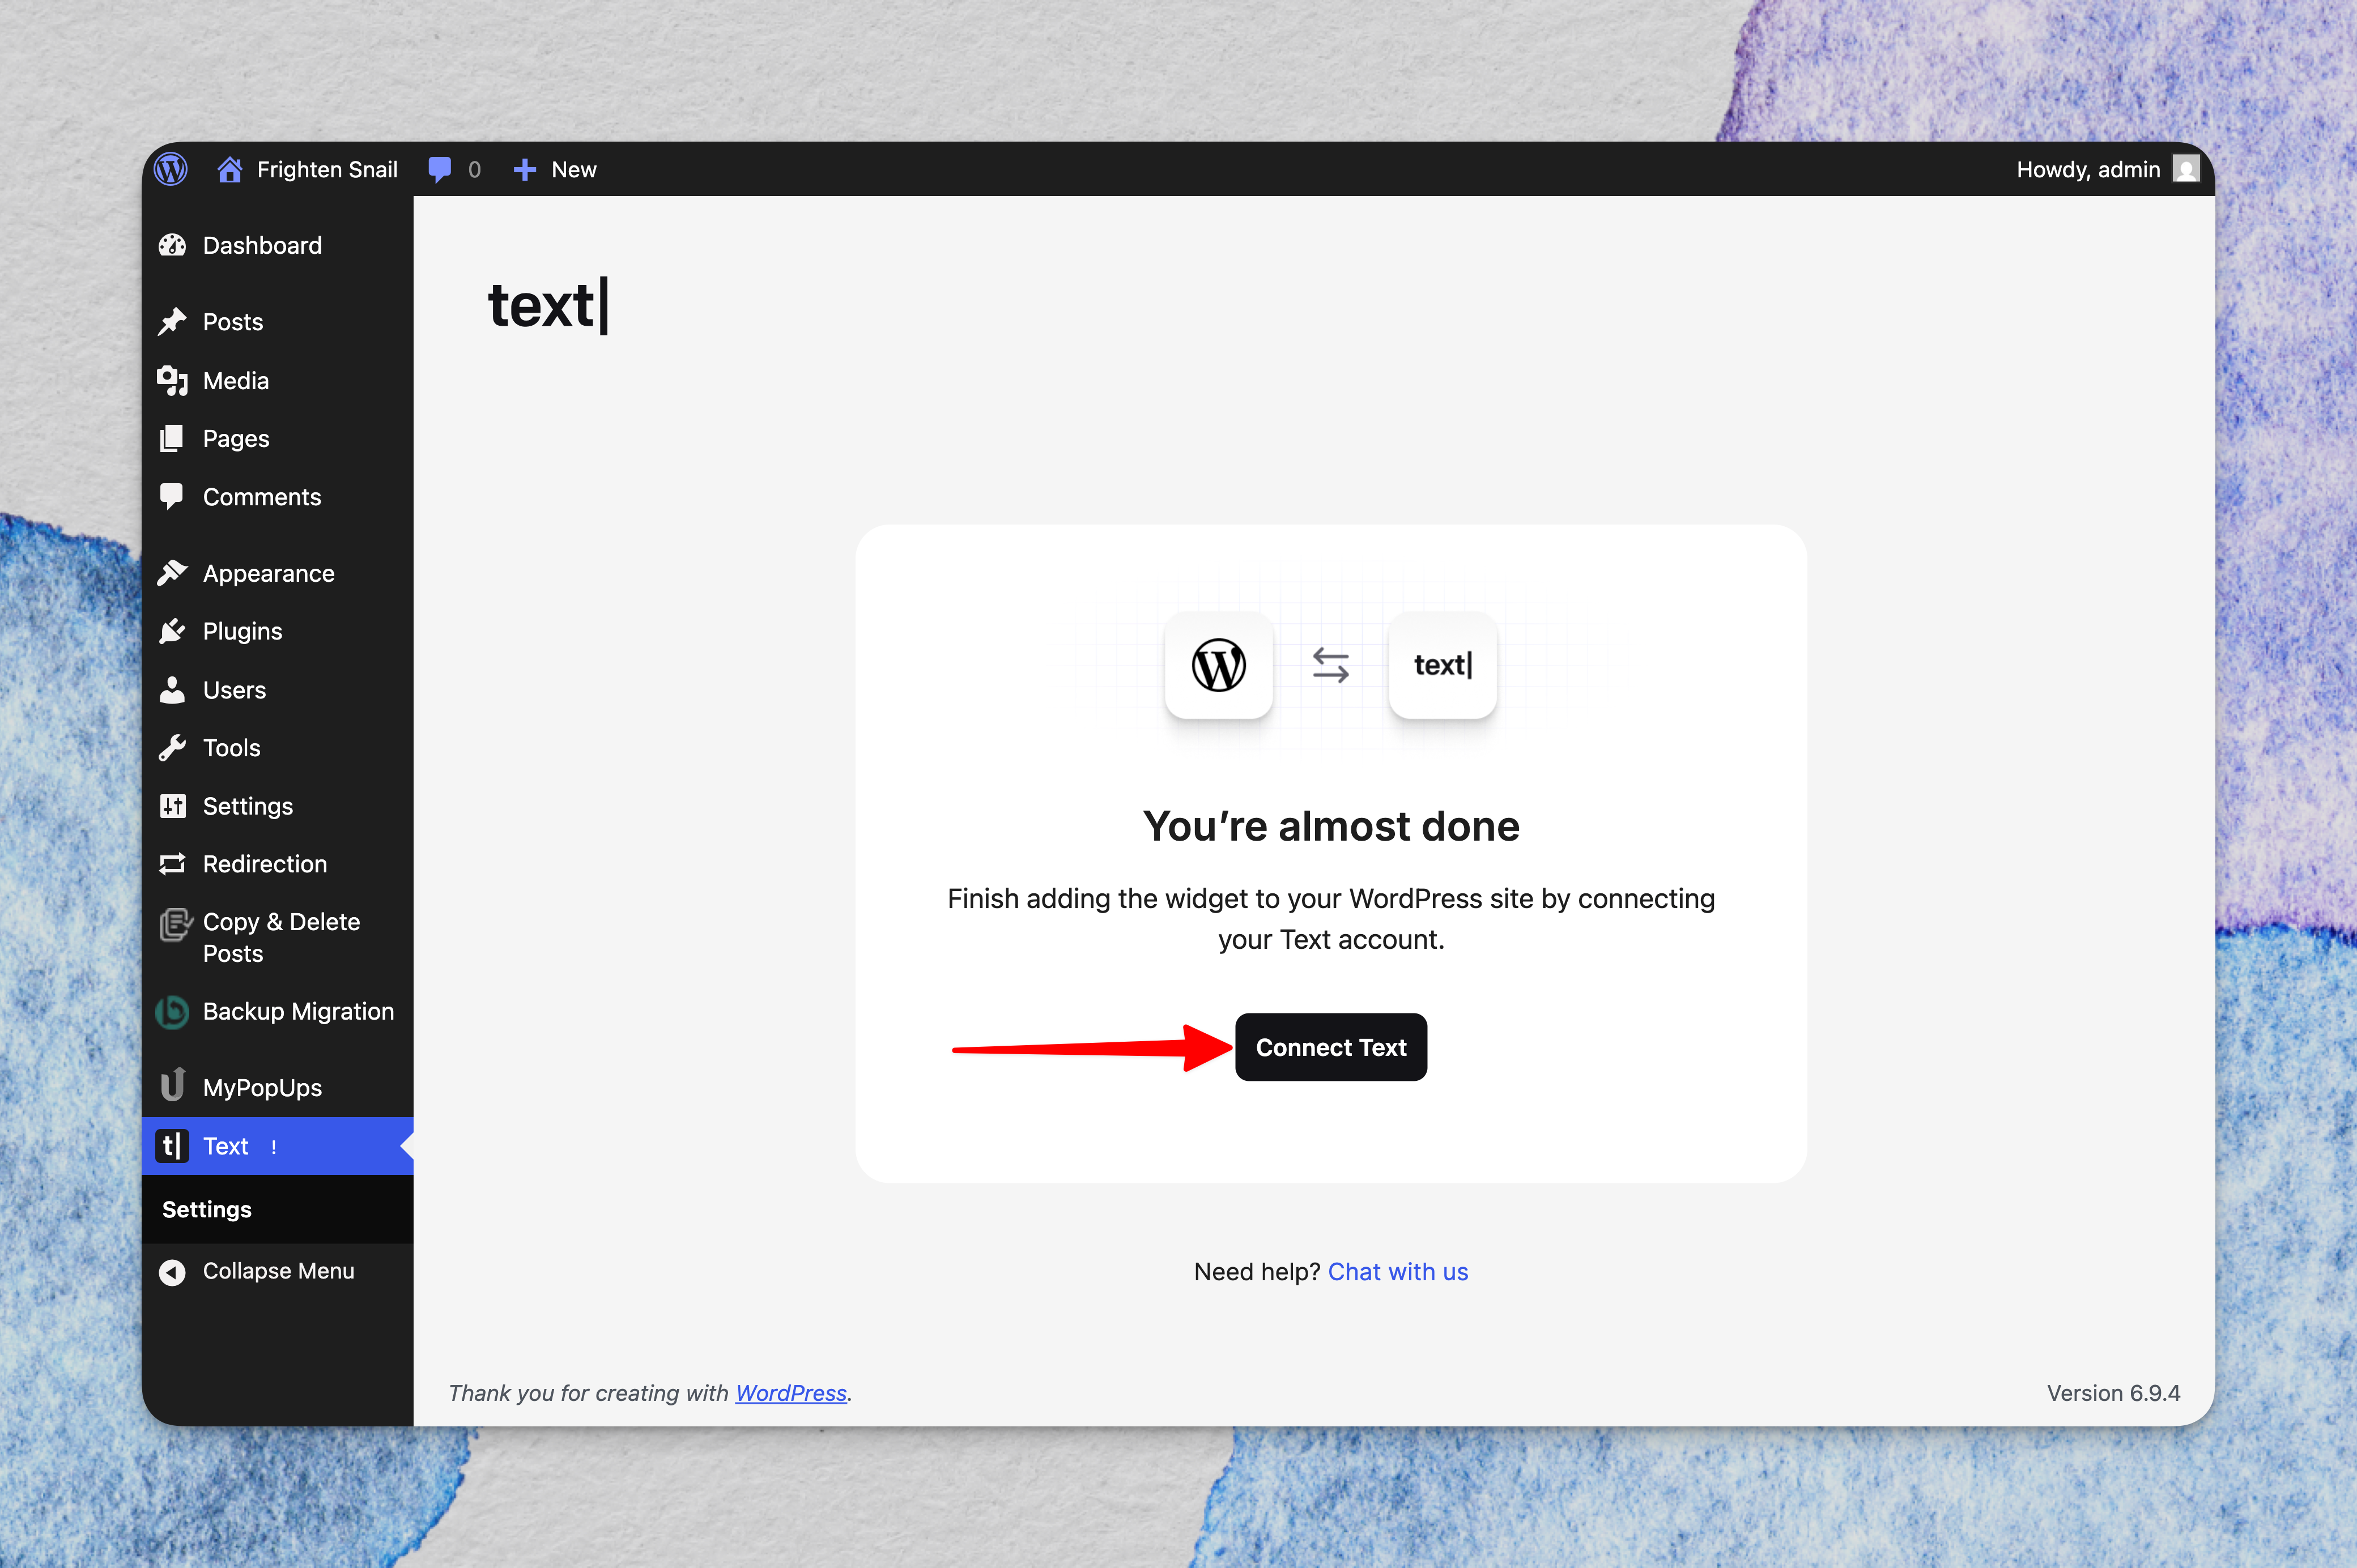
Step 6: Confirm the connection
Log in to your existing Text account or create one. When the connection is ready, WordPress displays a confirmation screen with options to customize your AI Agent or manage your website widgets.

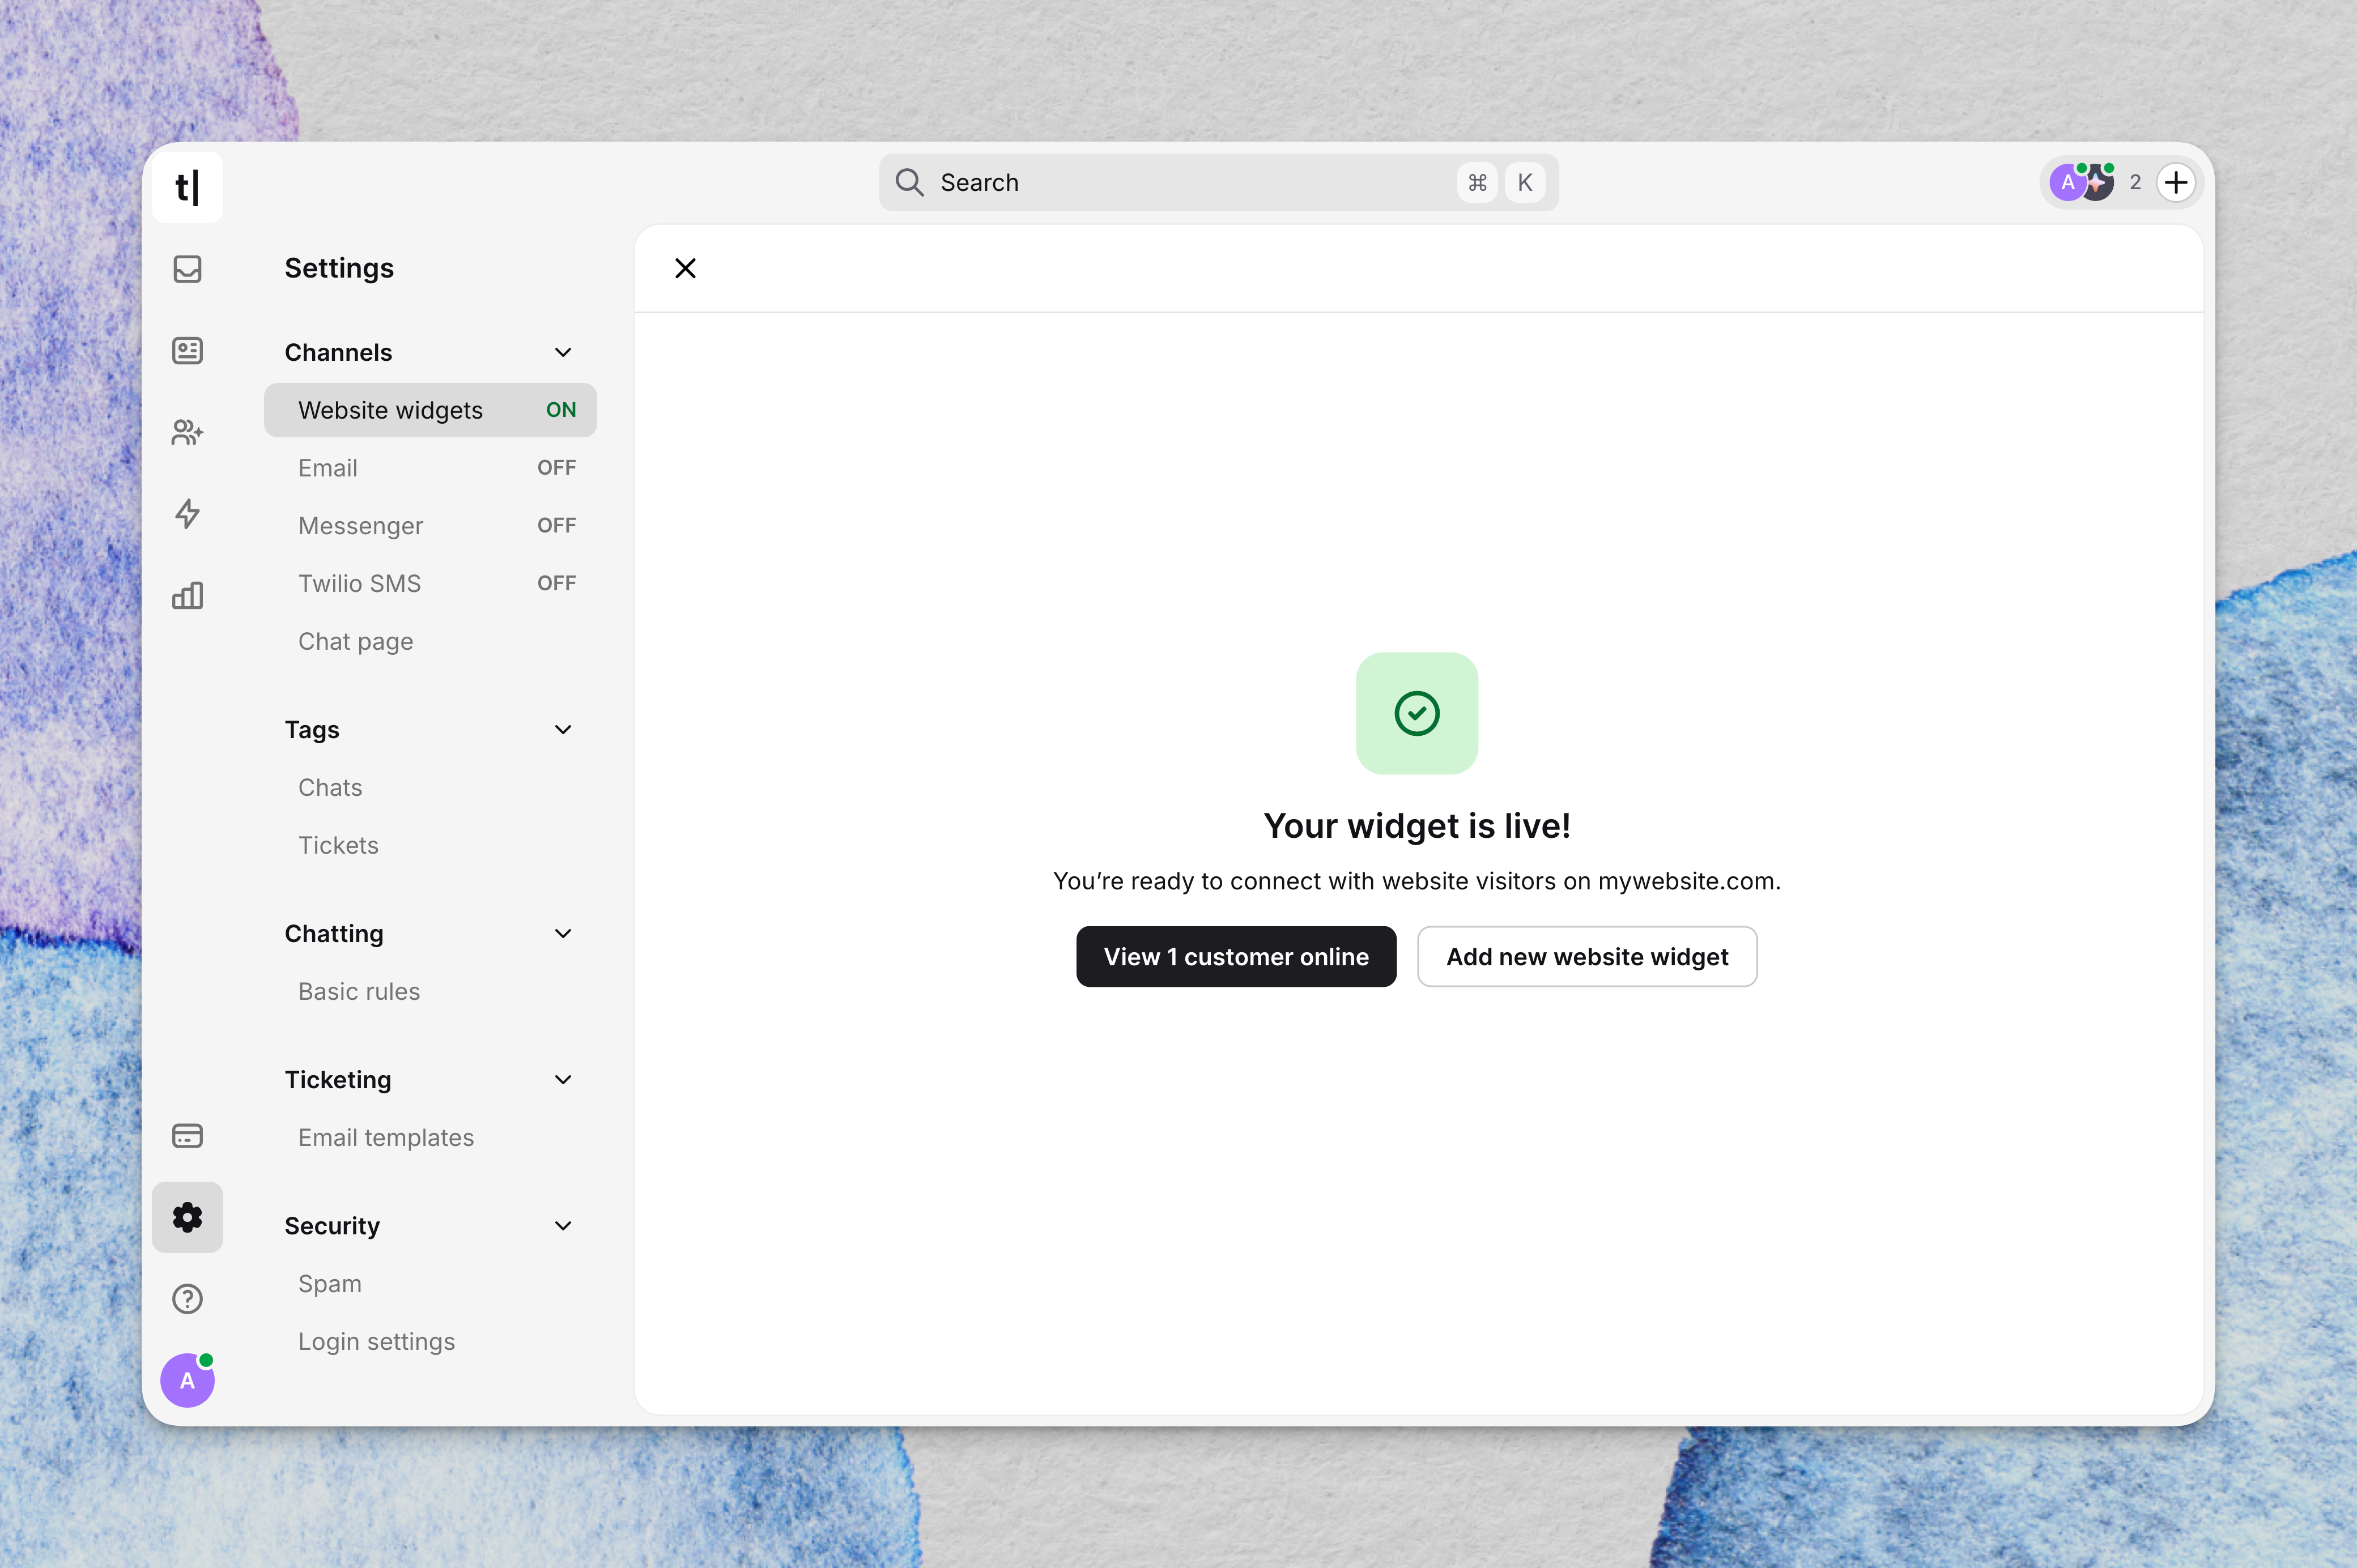
You can also confirm the connection in the Text App under Settings → Website widgets. The website status should be Connected.
Install the plugin manually using a .zip file
Use this method if you cannot install the plugin directly from the marketplace.
Step 1: Download the plugin
Open the Text plugin page in the WordPress Plugin Directory and select Download.

Step 2: Upload the plugin to WordPress
In your WordPress admin dashboard, go to Plugins → Add Plugin and select Upload Plugin. Choose the downloaded .zip file, then select Install Now.

Step 3: Activate the plugin
When the installation finishes, select Activate Plugin.
Step 4: Connect the plugin to Text
Open the Text tab in the WordPress sidebar and select Connect Text. Log in or create an account to finish connecting the widget.
Verify the installation
Visit your WordPress website and open the widget. Send a test message and confirm that your AI Agent answers as expected.
In the Text App, go to Settings → Website widgets and confirm that the website status is Connected. If necessary, return to Team → AI agents to refine the Agent’s knowledge, instructions, or Skills.
WooCommerce compatibility
If your WordPress website uses WooCommerce, the Text plugin automatically makes ecommerce context available during conversations. Your team can see information such as the customer’s cart contents and product details while helping them.
No additional setup is required. Without WooCommerce, the website widget continues to work normally, but WooCommerce information is not available.
Previous ChatBot Visual Builder and AI Assist workflow
By utilizing chatbots, you can address your customers’ inquiries outside of regular business hours, assist them during the purchasing process, and create potential leads for your marketing team. Learn how to integrate a chatbot onto your WordPress site to improve your customer communication.

How to install ChatBot on your WordPress site
Connect ChatBot to your WordPress site in a few simple steps and open an additional communication channel for your customers.
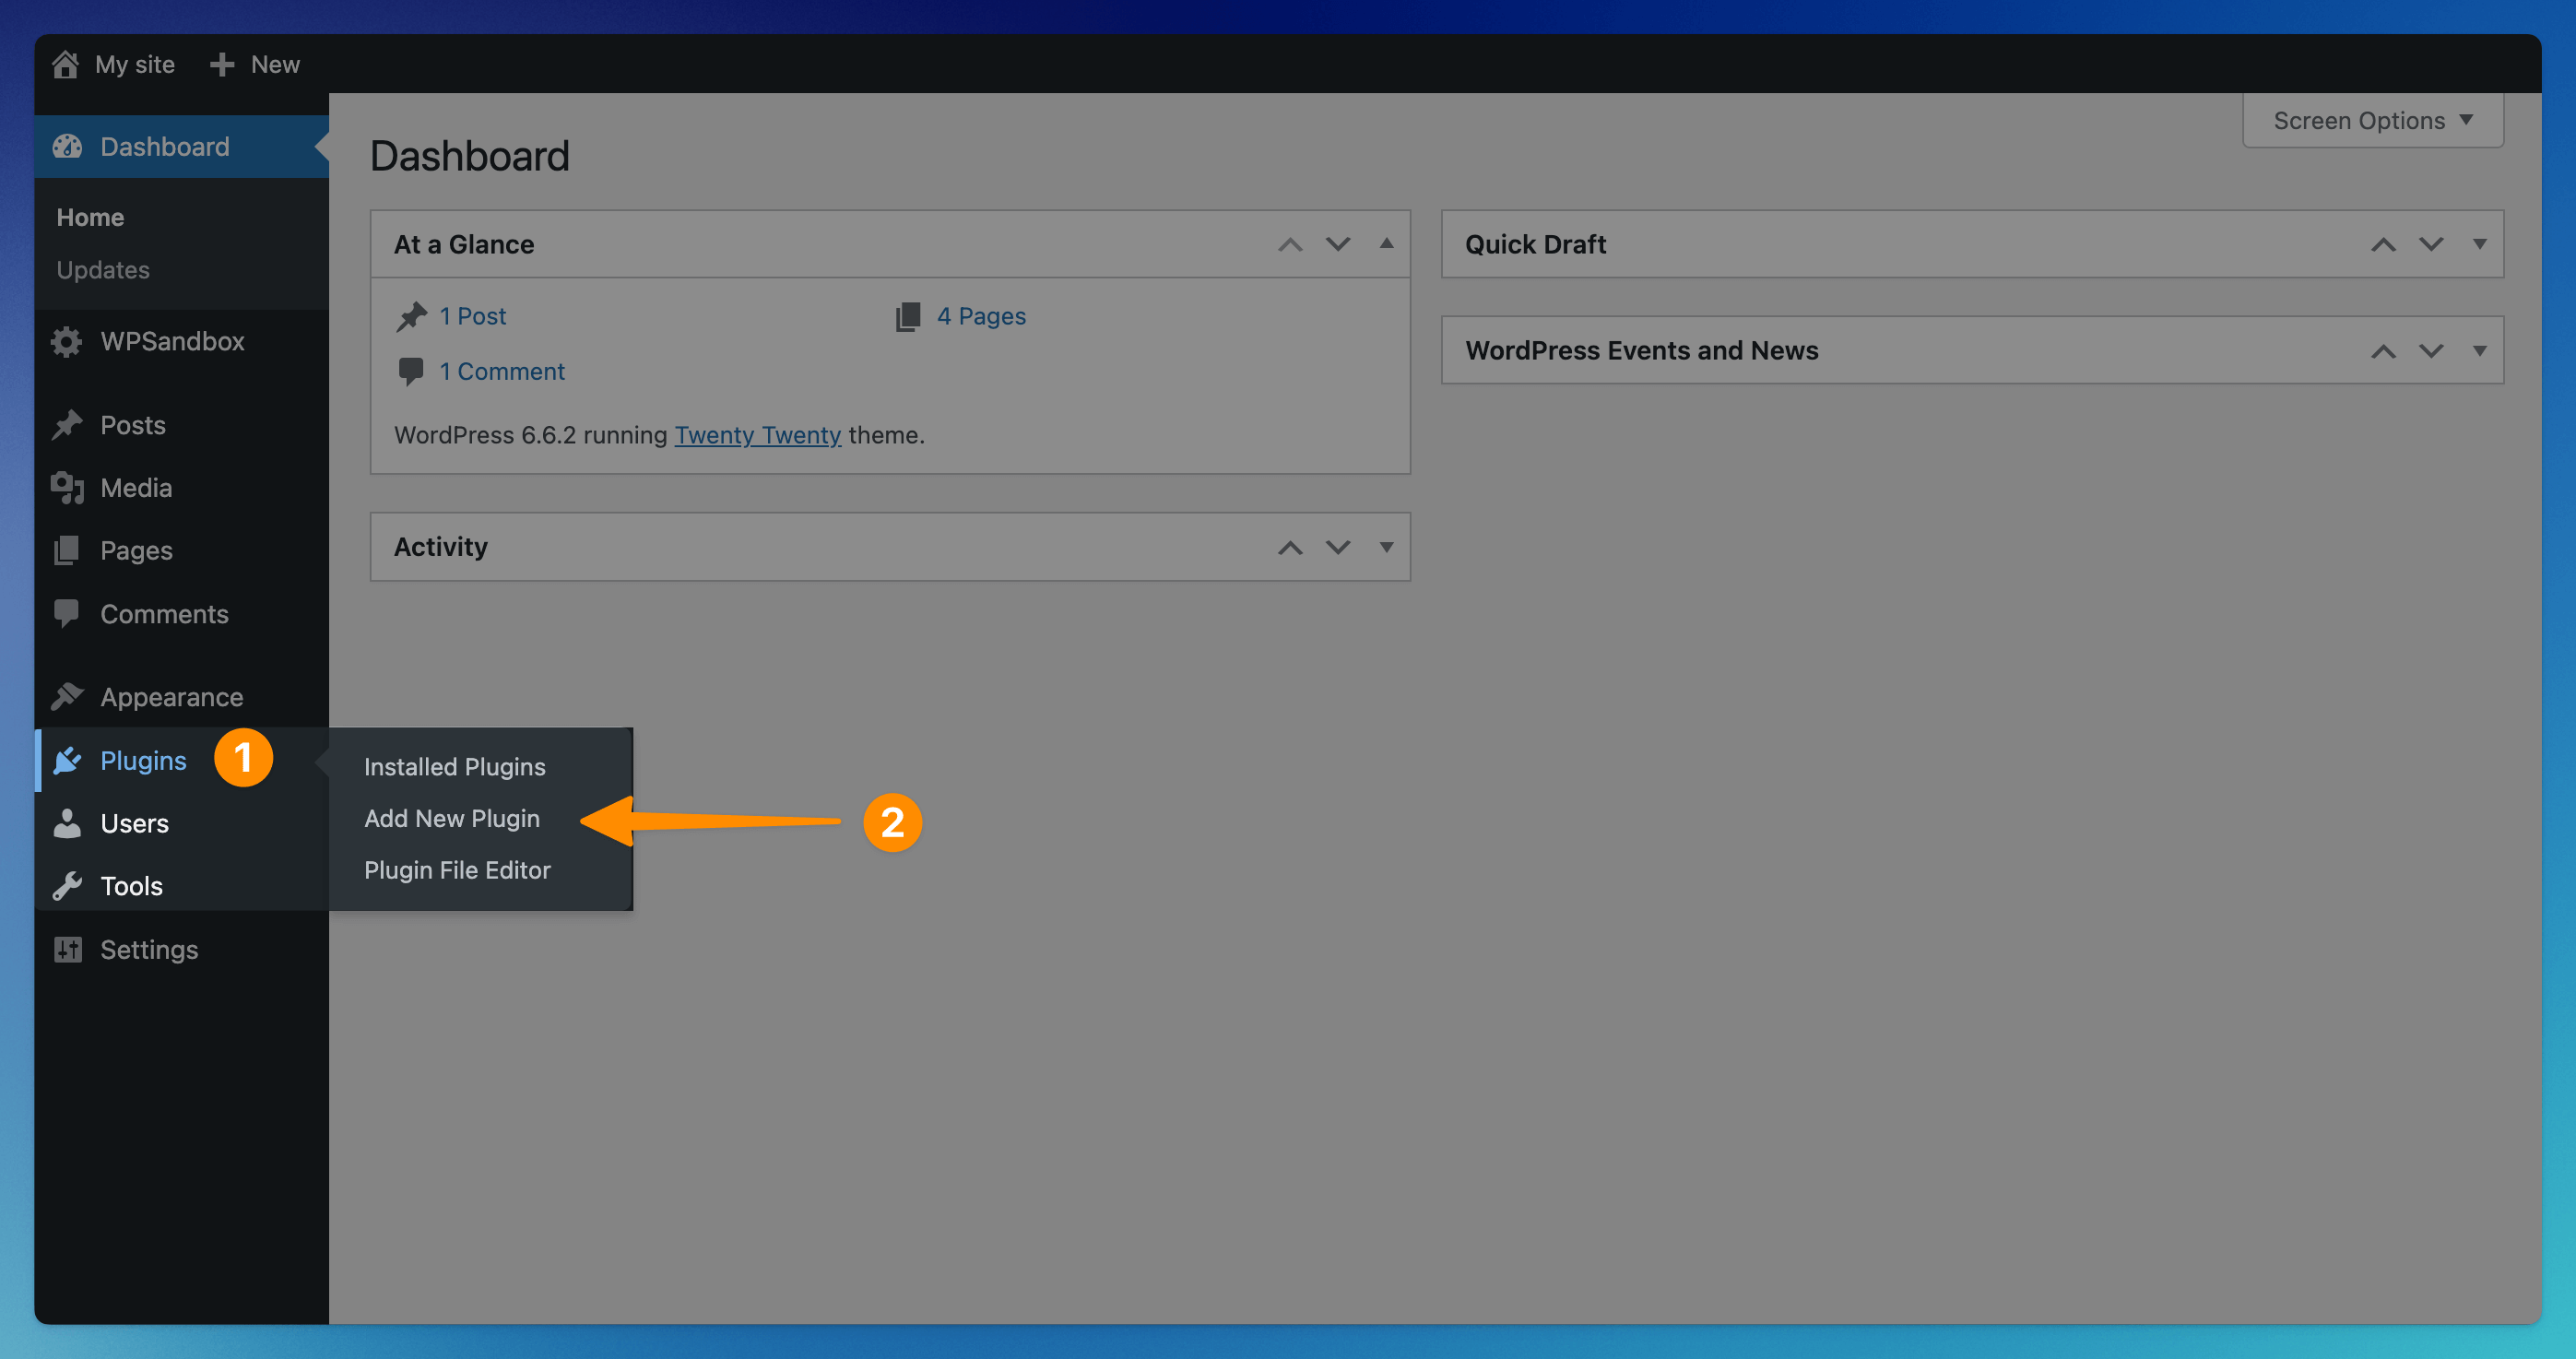
- In your WordPress Dashboard, click on the Plugins (1) section and choose Add New Plugin (2) from the list.
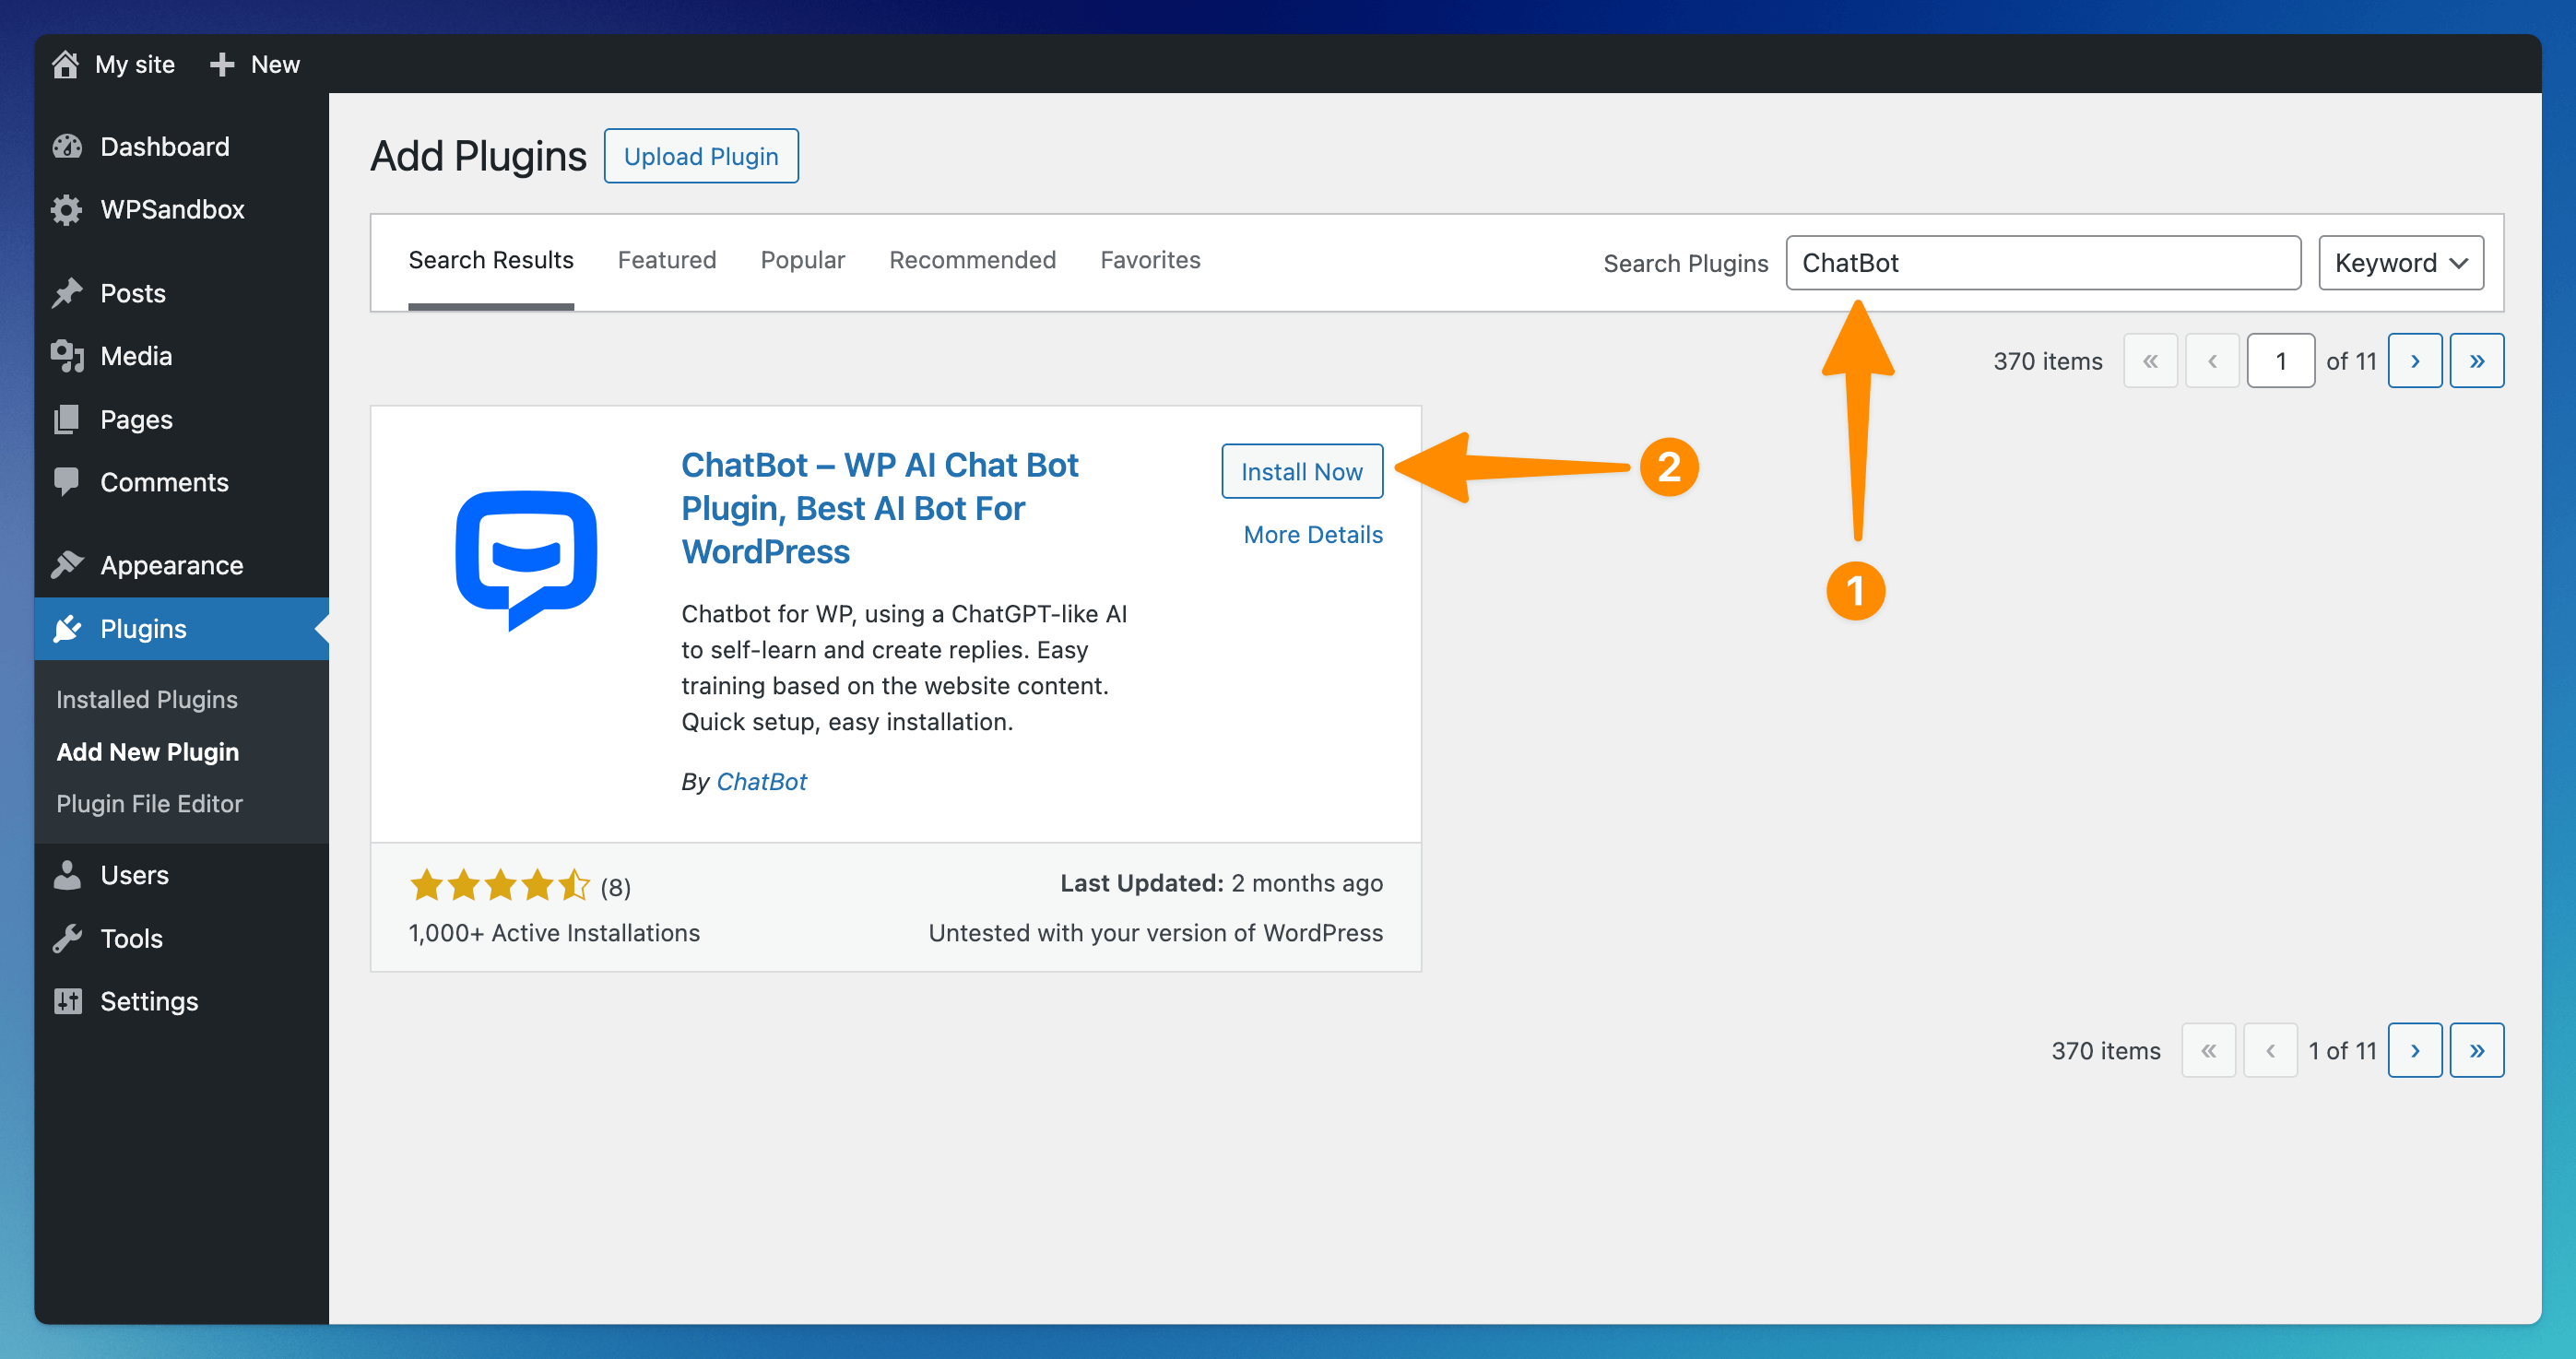
- Type ChatBot in the search bar located on the right (1). Find ChatBot – WP chat bot plugin for WordPress on the list, and click on Install Now (2) to proceed.
- Once the plugin is installed, click on the Activate button.

- You will be redirected to the Plugins section in your WordPress. Click on the Settings button available under the ChatBot.com plugin.

- On the next page, click on the Connect account button. If you’ve already signed up, you will be logged in automatically. If you’re not logged in to ChatBot, you can log in or create a new account.

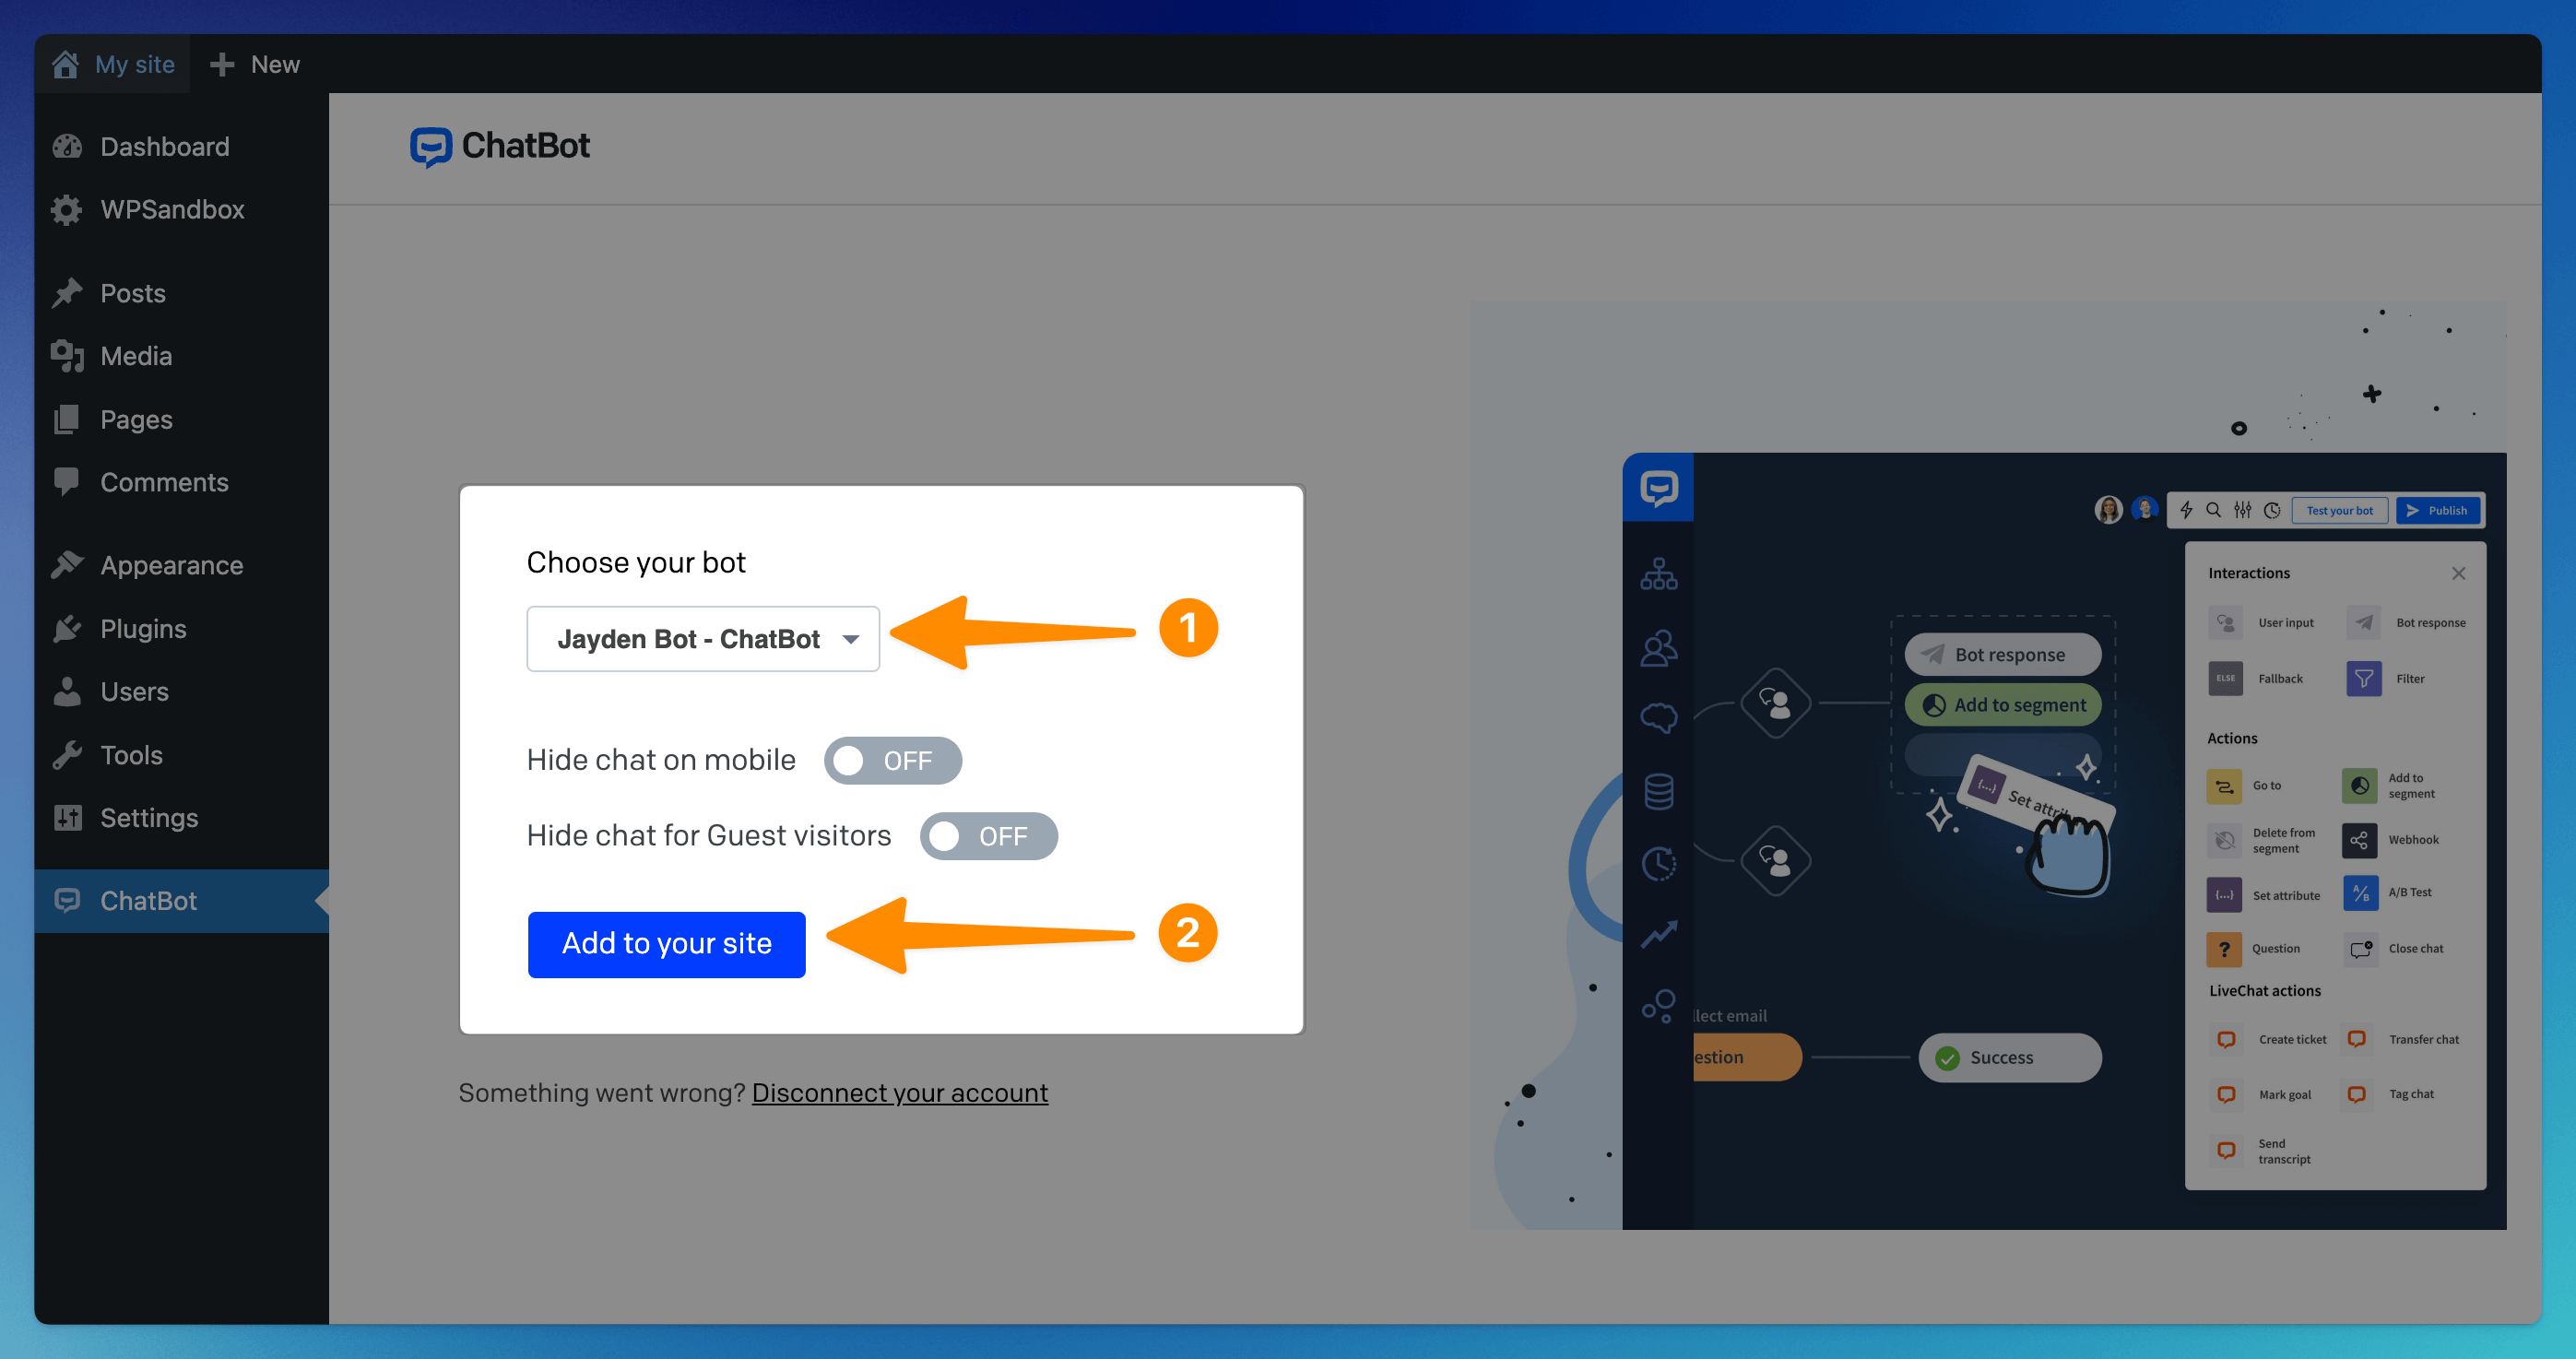
- Almost ready! Select the bot you will use on your website (1). You can also decide whether your widget should be hidden on mobile or for guests. After that, click the Add to your Site button (2) to finish the installation.
- Done! Your bot should now be visible on your WordPress site. You can always come back to the plugin settings page to manage the integration.
Read more: